This guide explains how to combine your captured photos and maps to generate a single-page PDF report.
Launch the App and Tap "Create PDF"
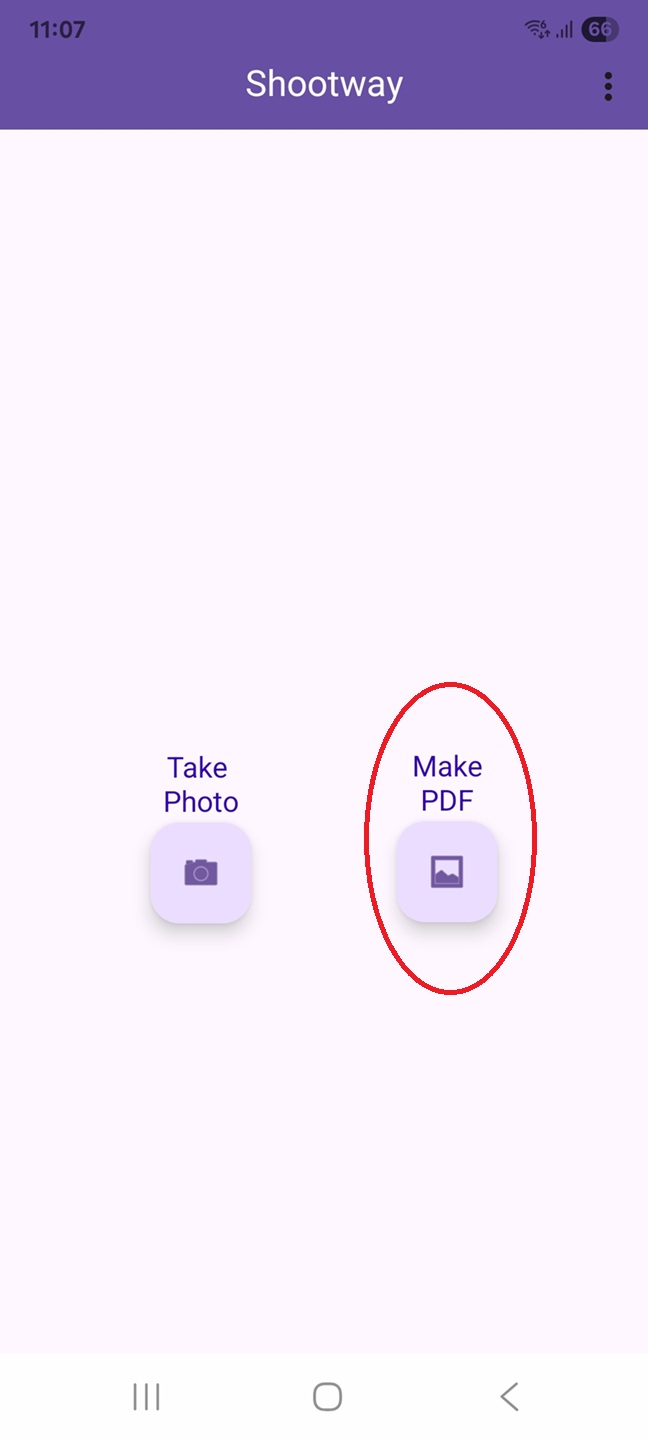
Launch the app and tap "Create PDF" (the folder/gallery icon) on the right side of the screen.
Select Up to 3 Photos
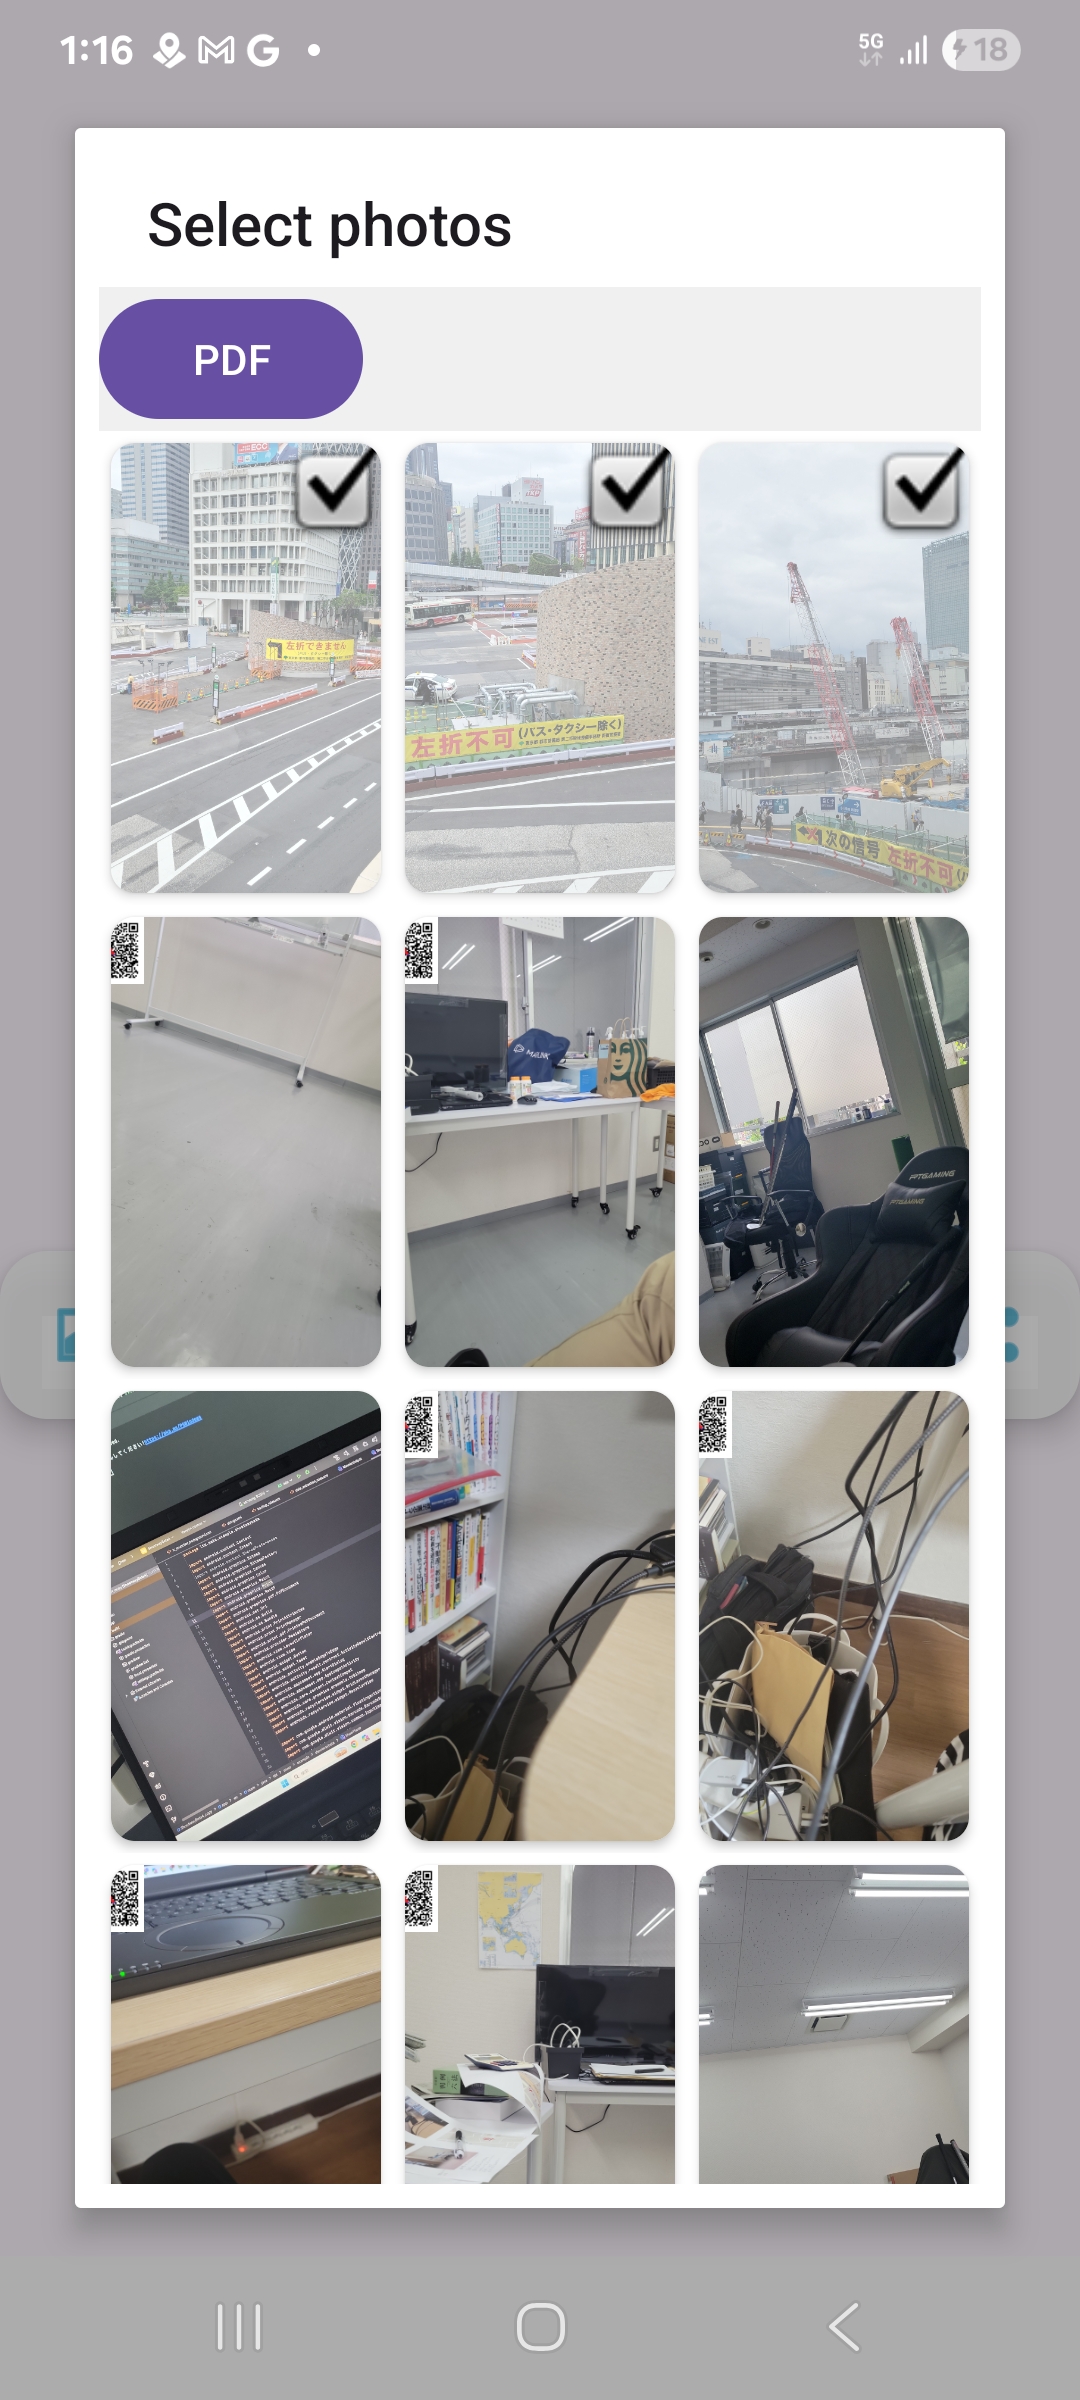
From the photo list, select the photos you want to include in the PDF (maximum of 3).
The first photo requires long-click (long and hold),
while a short click (tap) will open the Viewer, showing the photo along with its directional map underneath.
Adjust the Area and Scale of the First Map
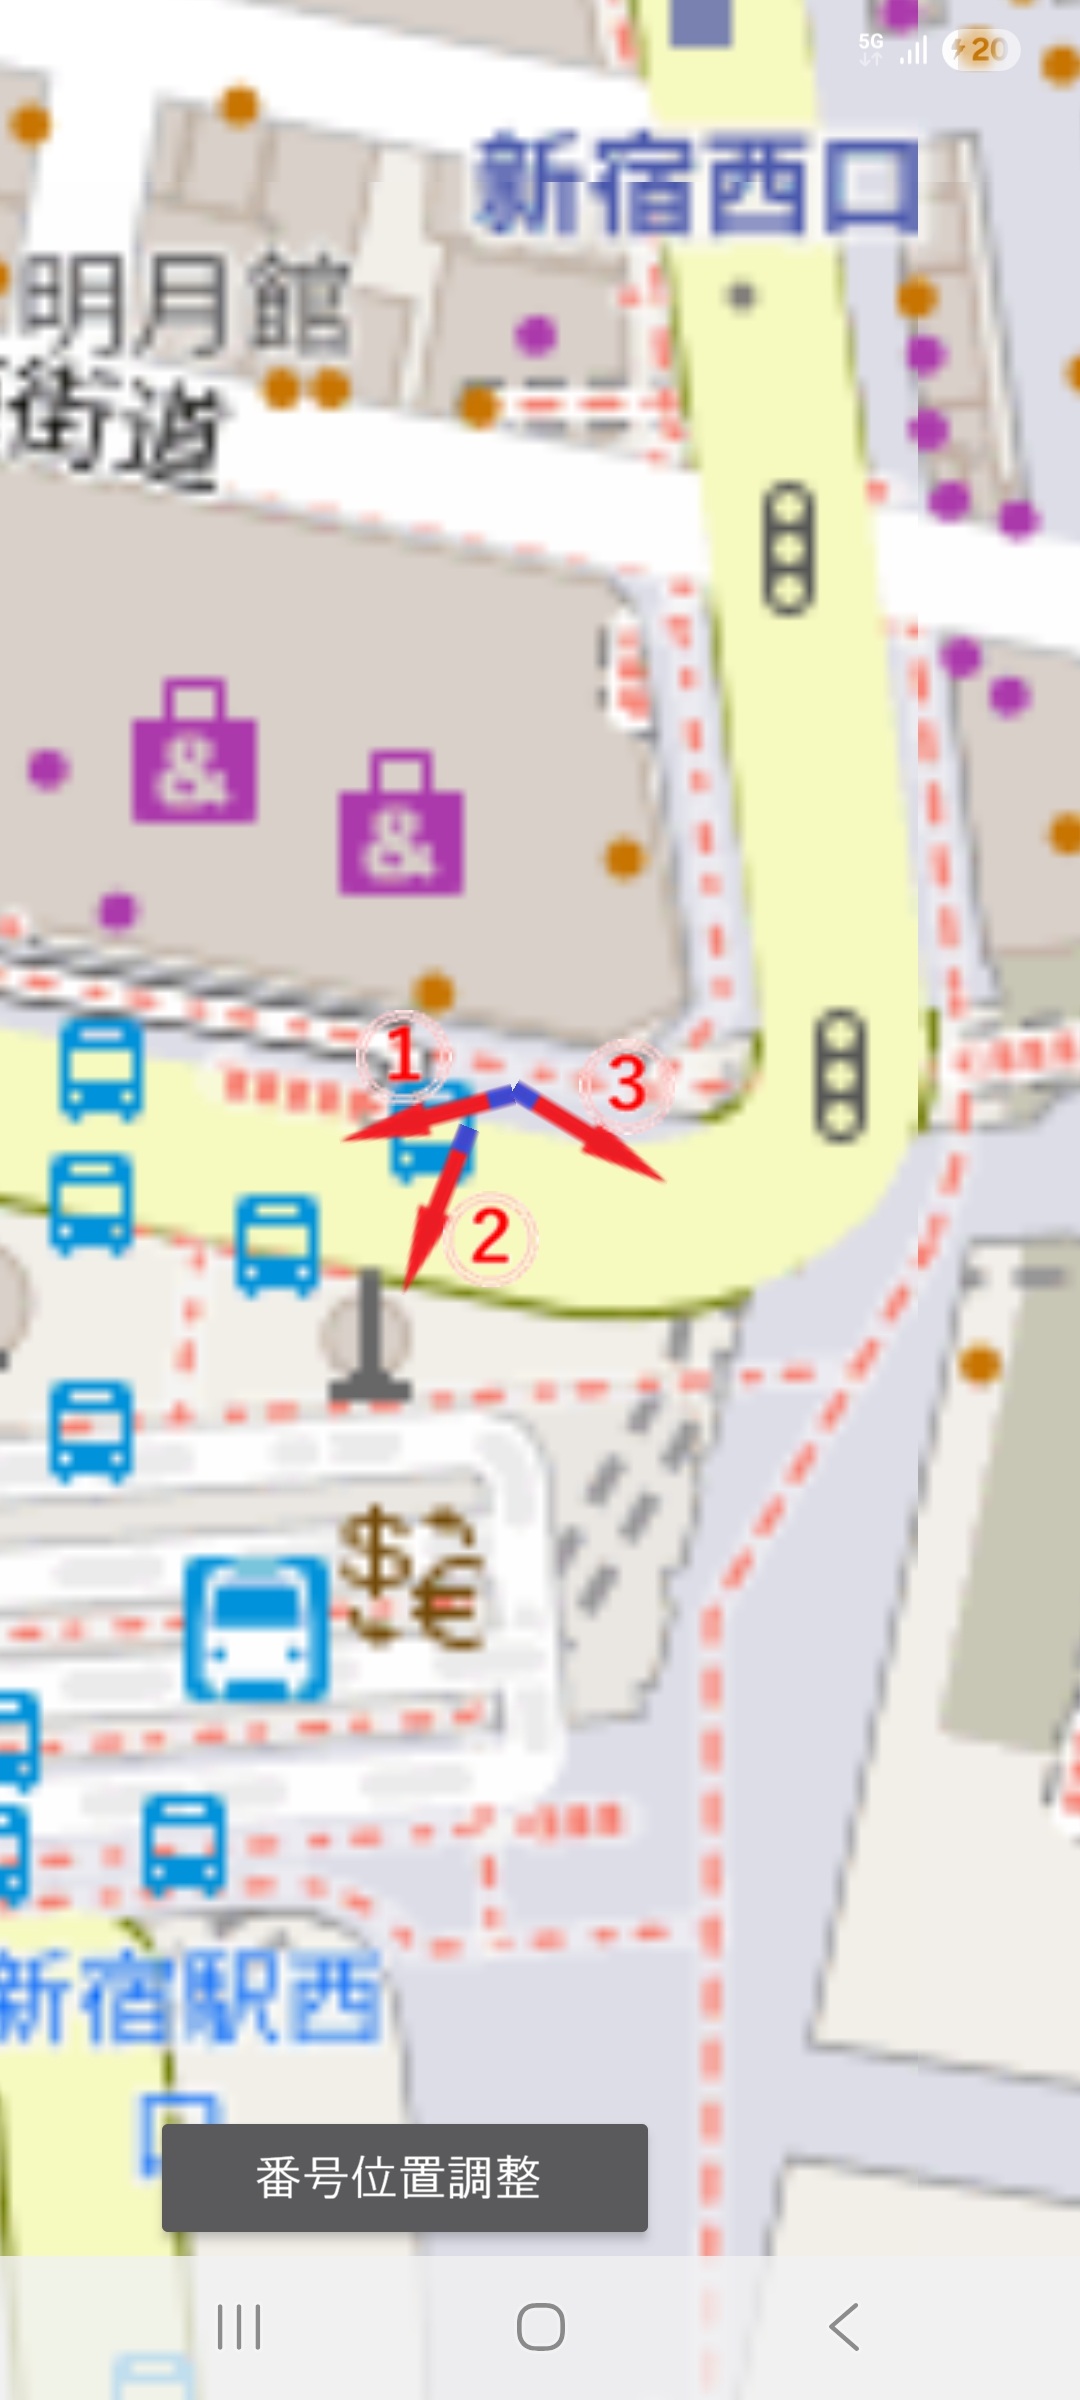
A map will be automatically generated based on the data in QR code of the selected photos.
Pinch in or out (zoom in/out) on the screen to adjust the map to your preferred size and range.
Long-click (press and hold) anywhere on the map to proceed to the next step.
If the number markers (①, ②, ③) overlap with other elements and are hard to read, tap the "Adjust Number Position" button at the bottom-left of the screen.
This allows you to move the number markers to the left side, tip, or right side of the arrow.
Adjust the Area and Scale of the Second Map

Next, a second map (usually used for a wider-area overview) will be displayed.
Similarly, adjust the scale and location for your report.
Long-click anywhere on the map to proceed.
Enter the Title for the PDF Page
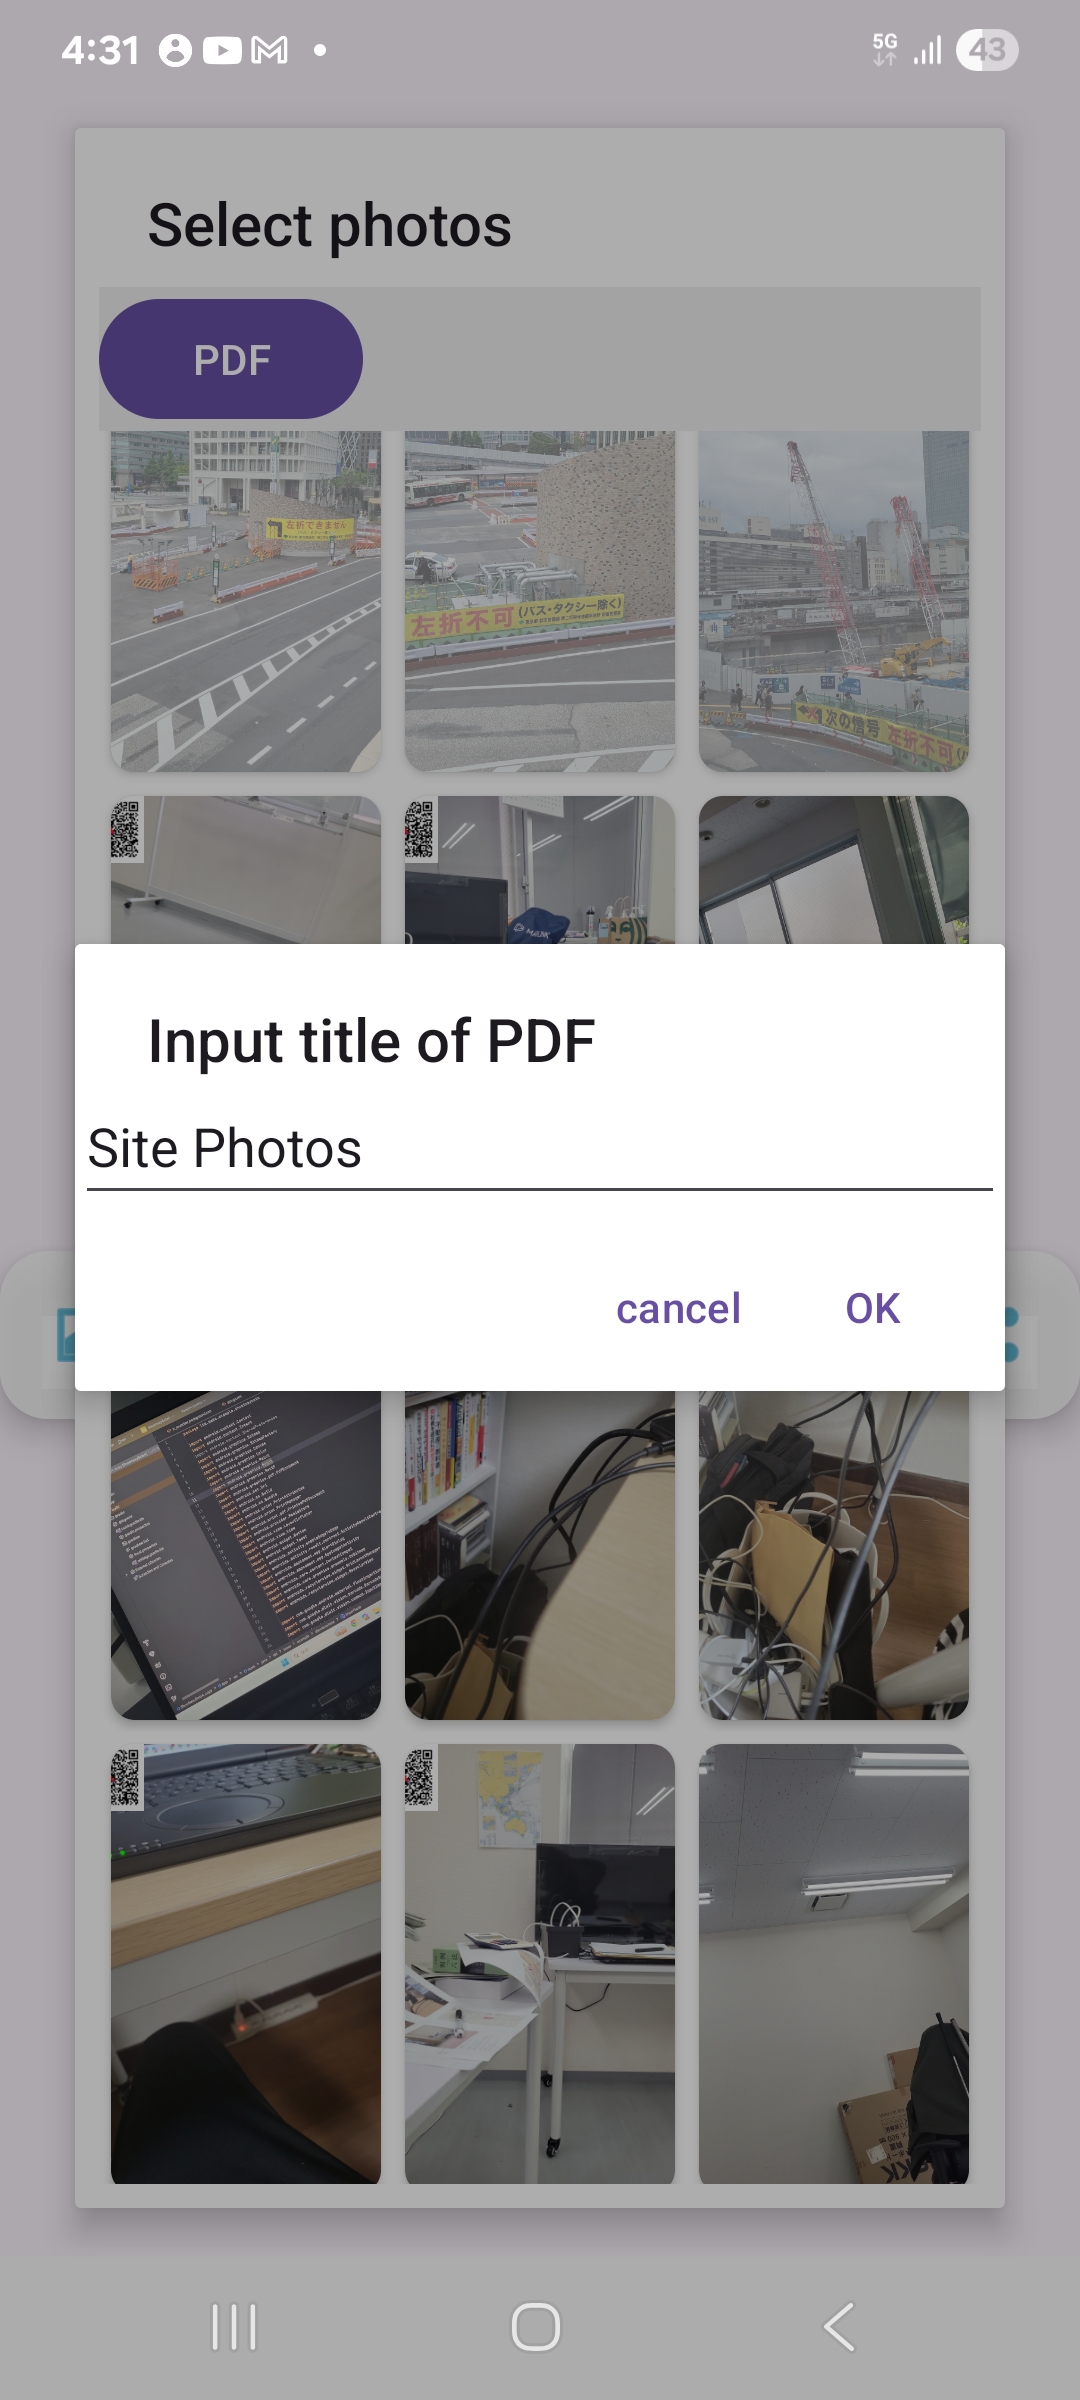
Enter a title (free text, max60 characters) to be displayed at the top of your PDF page.
The default value is "Site Photos".
Tap "OK" to proceed.
Generate and Save the PDF via Print Spooler
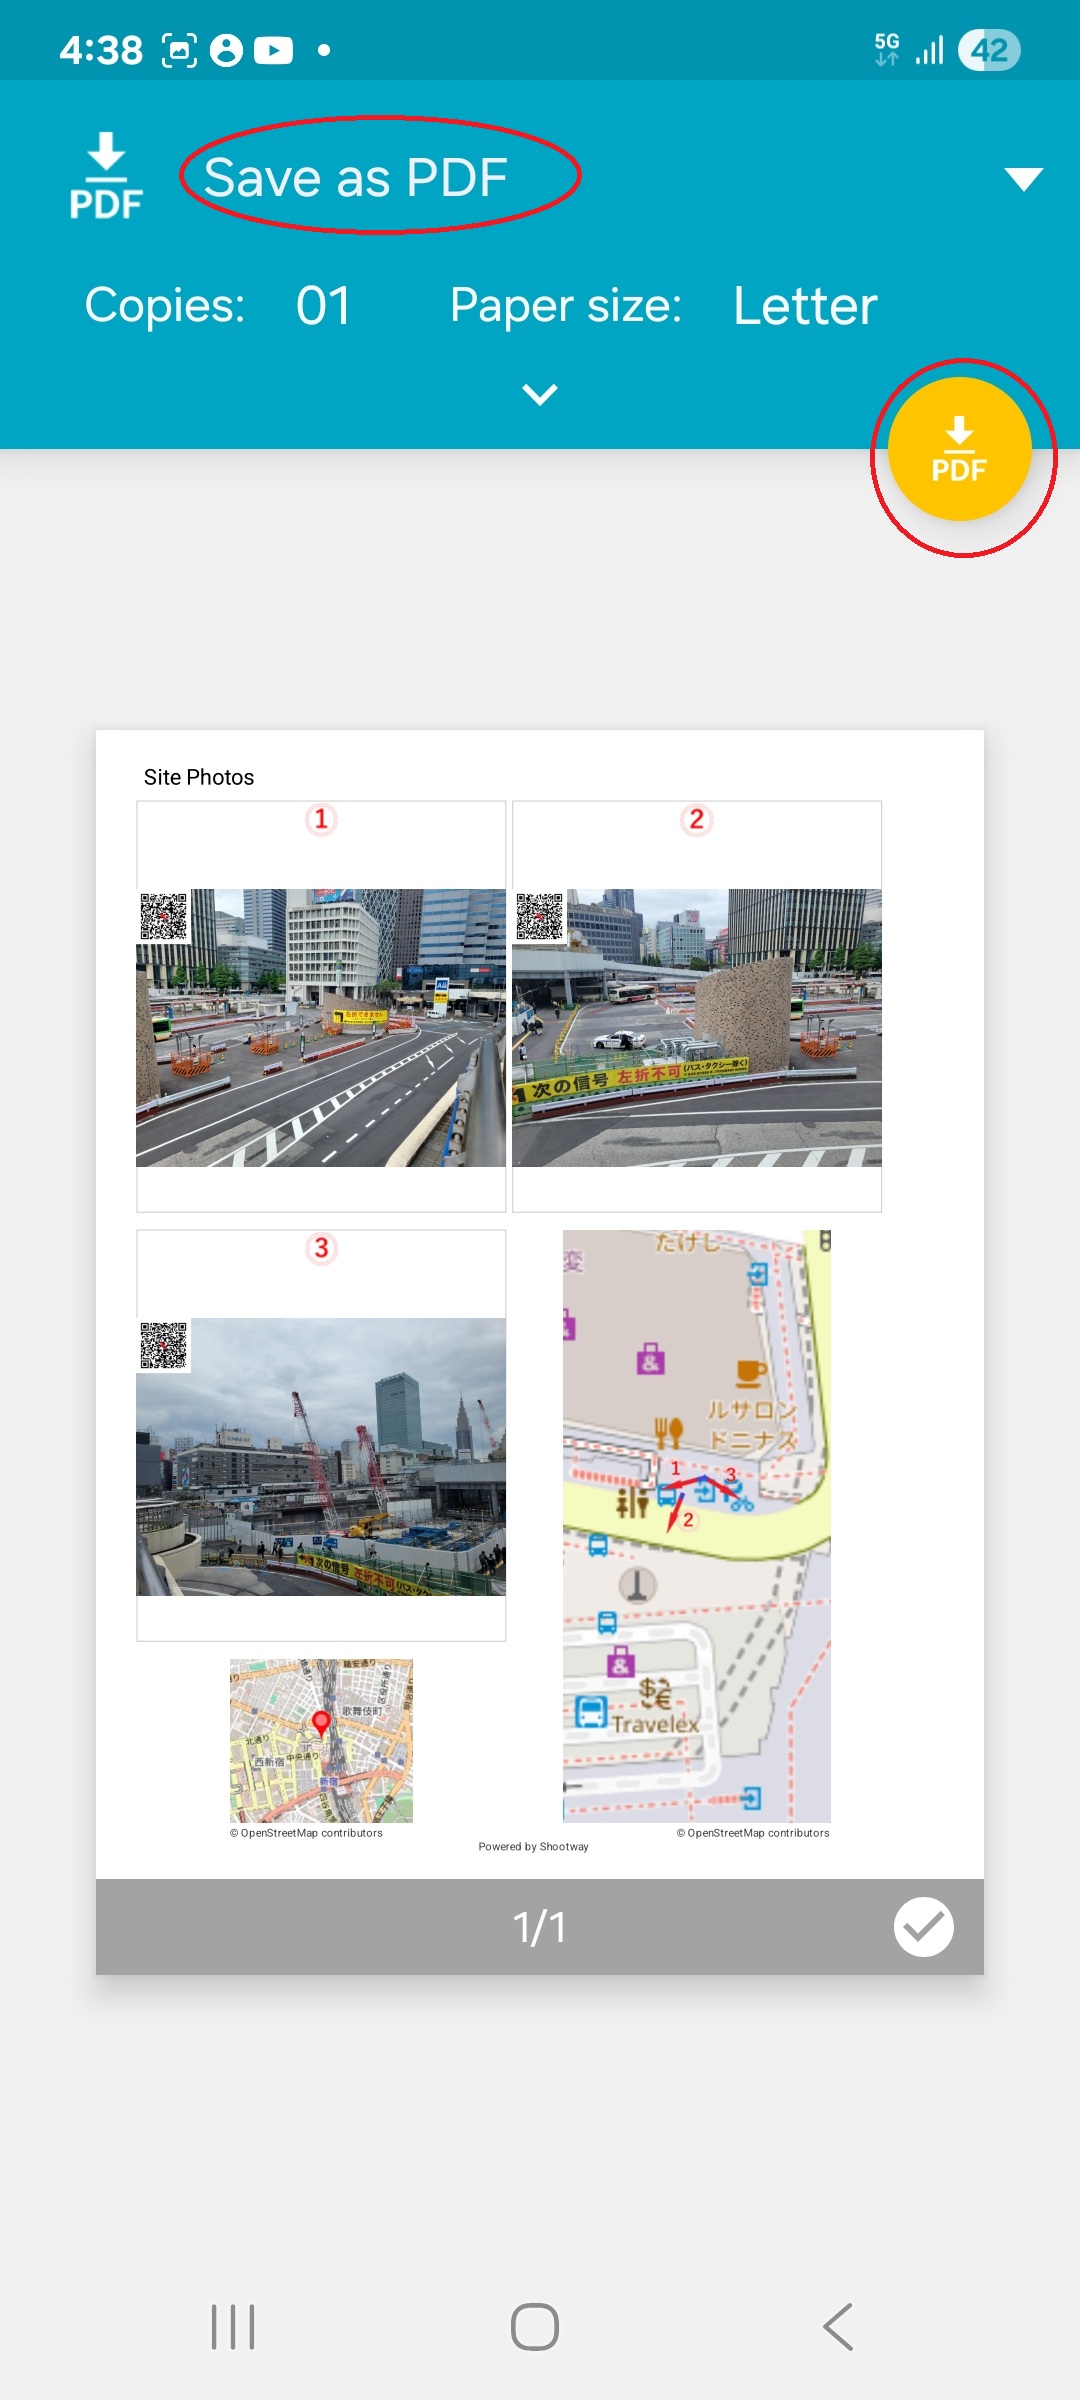
The Android system Print Spooler will launch. To save the file, select "Save as PDF" abd press "PDF" button..