This guide explains how to take photos embedded with location and direction data using the Shootway app.
Launch the App and Tap "Take Photo"
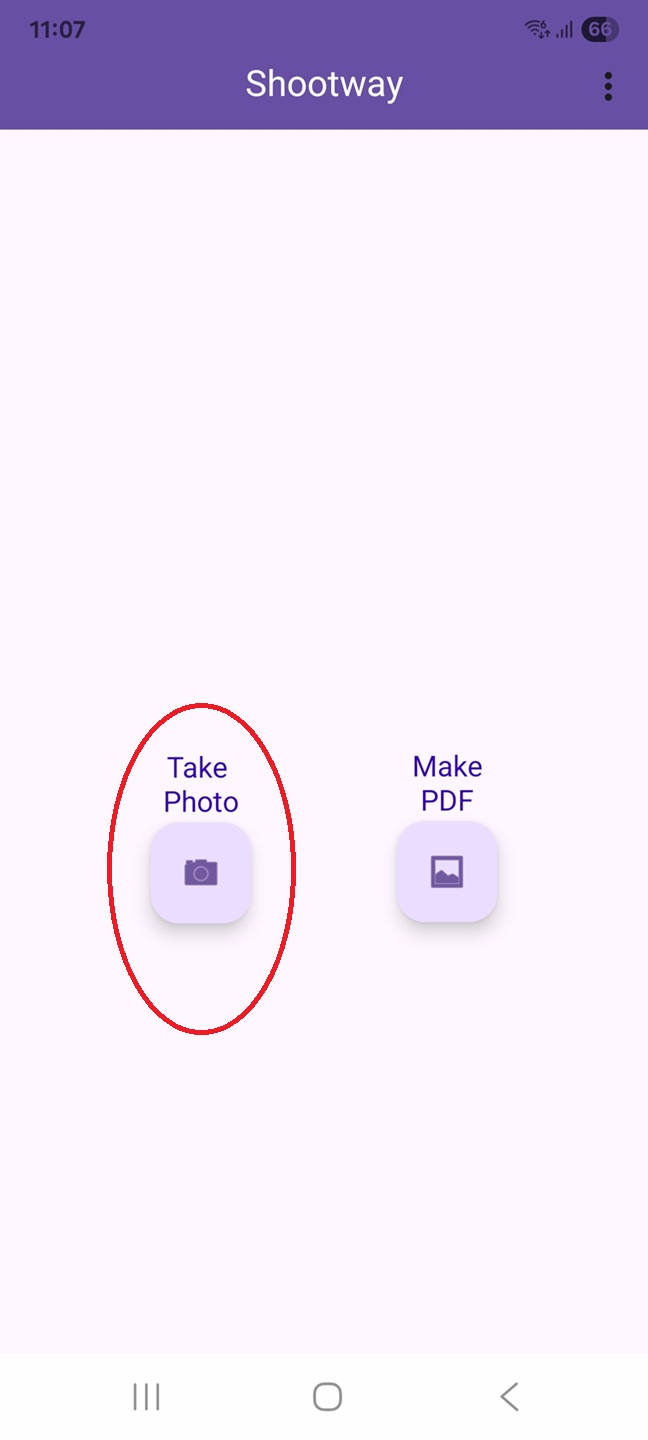
When you launch the app, the home screen will appear.
Tap "Take Photo" (the camera icon) on the left side of the screen to enter camera mode.
Aim the Camera and Shoot

The screen will switch to camera mode. Aim the lens at the subject you want to record and press the "Take Photo" button.
*Please grant permission for location access and camera use when launching the app for the first time.
Save or Adjust Location & Direction

Your shooting location and direction will be displayed on the map.
To save as it is, tap "SAVE". The photo will be saved, and you will return to the camera screen.
If you need to correct the location or direction, tap "ADJUST".
Adjusting Location & Direction
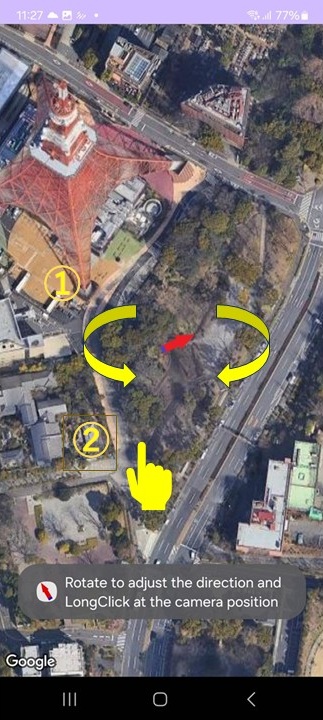
1. First, rotate the map with two fingers to align the arrow with the direction camera was facing.
2. Next, long-click (press and hold) with one finger on the exact spot where you took the photo.
The app will automatically return to the previous screen.